Vulnerability Management with Nessus
Background:
This project aims to use Nessus, a vulnerability scanning tool, to assess the security of personal computers and devices in a home network. The goal is to identify vulnerabilities, outdated software, and misconfigurations that could be exploited by attackers.
General Procedure:
Here are the general steps that I'll be taking to set up and scan with Nessus:
- Configure a Nessus container via Docker.
- Perform a basic scan on a host.
- Remediate vulnerabilities.
- Rescan the host to ensure vulnerabilities have been resolved.
The Project:
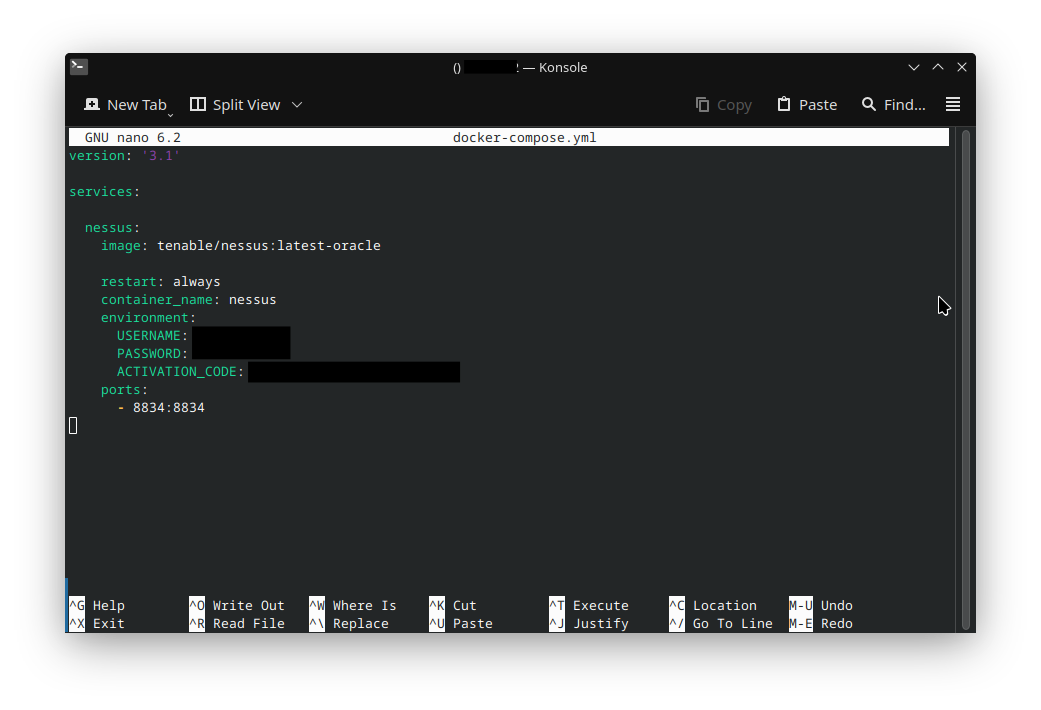
To keep things simple, I'll be setting up Nessus as a Docker container using docker-compose (Docker information here). My docker-compose.yml configuration is below. Registering for Nessus will give you an activation code to put on the ACTIVATION_CODE line.
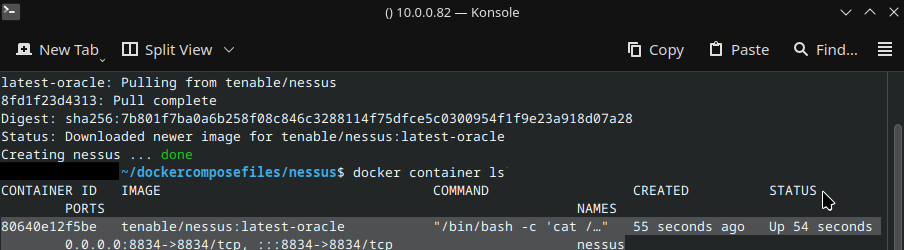
Once the docker-compose.yml is configured, type 'docker-compose up -d'. This will start the Nessus container defined in the YAML file. Once that's finished, run 'docker container ls' to verify that the container is running.
You should now be able to access the webpage using the IP of the server and port 8834. Use the username and password listed in the YAML.
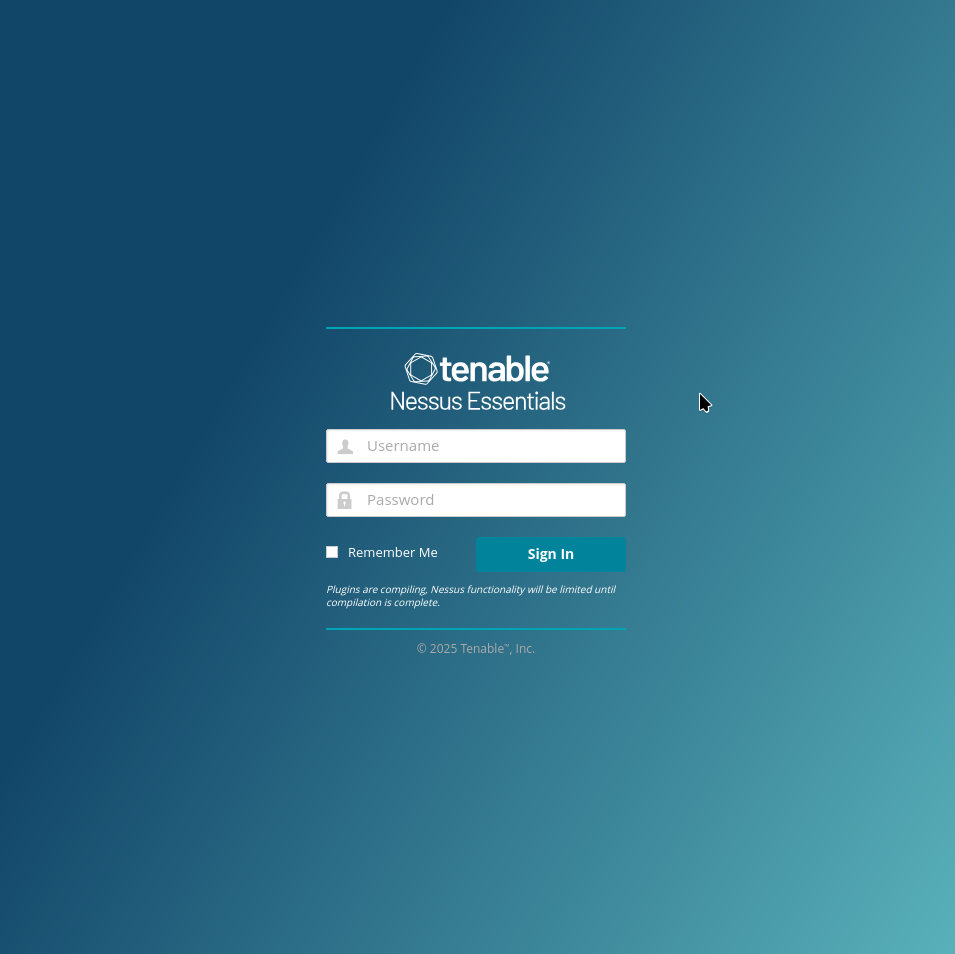
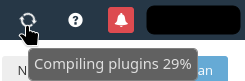
You'll see a message stating that Nessus is compiling plugins. Wait until the plugins are done compiling.
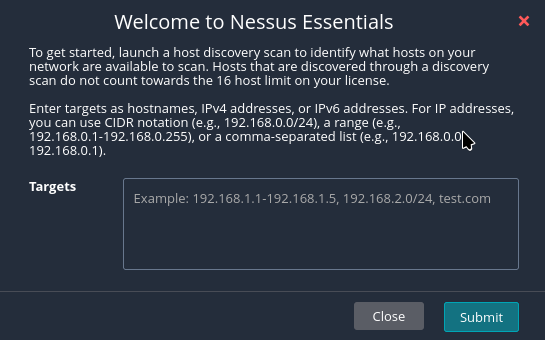
Once the plugins are compiled, you'll reach a "Welcome to Nessus" window, asking to launch a host discovery scan. The discovery scan will identify hosts on the network, but I will skip it for now, since I want to scan a single host.
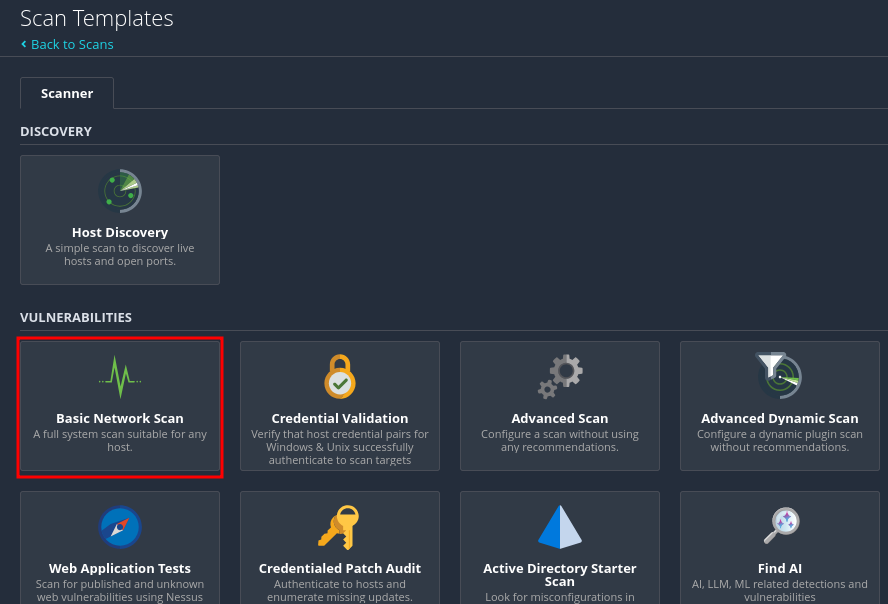
Click "New Scan", and select "Basic Network Scan". This will bring you to a window where you can configure the scan settings.
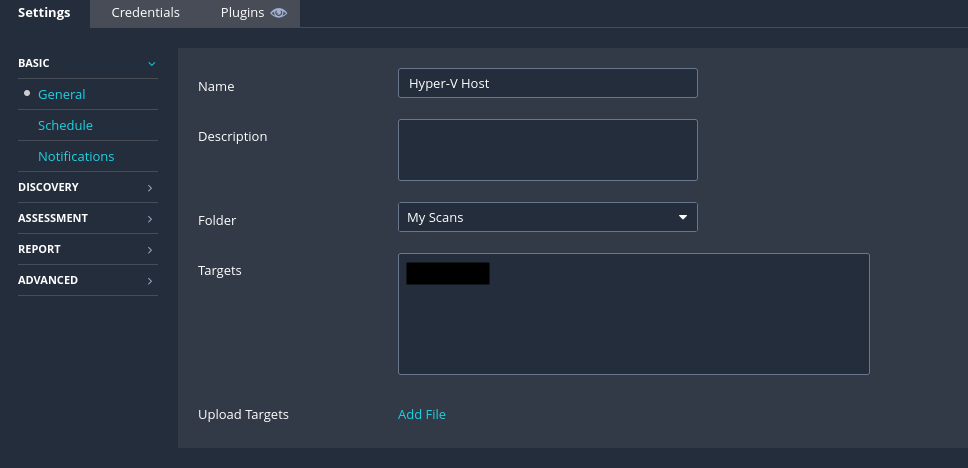
On the first tab, give the scan a name. In the "Targets" section, list the IP address(es) of the host(s) that you want to scan.
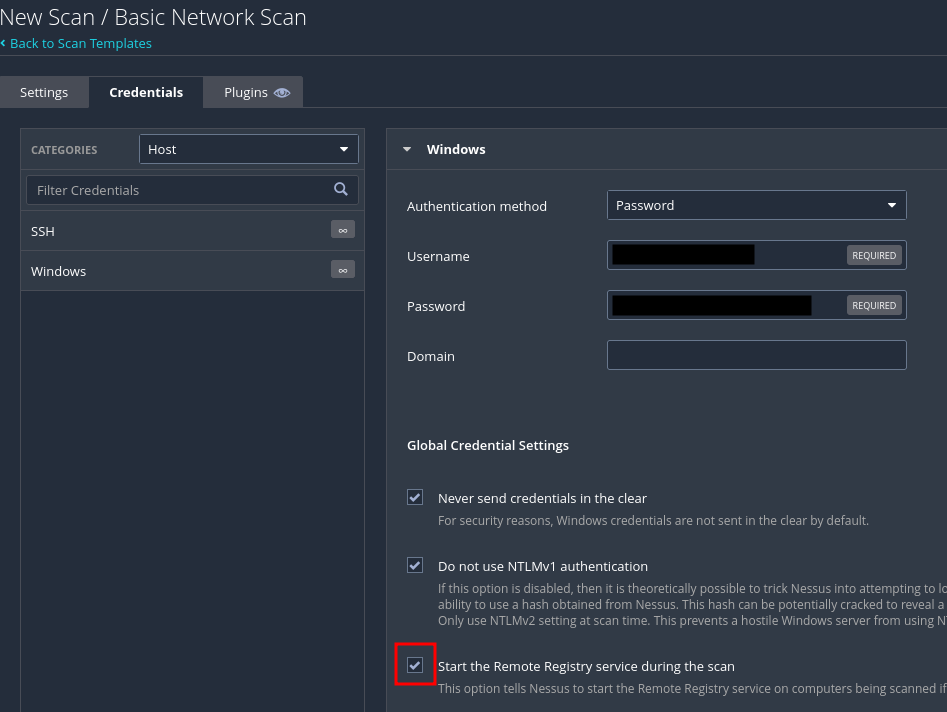
Click the "Credentials" tab. For me, I'm scanning a Windows computer, so I picked Windows, then listed the username and password of an administrative account. Be sure to check the "Start the Remote Registry service" box. This allows the scanner to gather detailed information about the host.
Leave everything else default and click Save. This will return you to the Scans menu. To start the scan, click the play button on the right side of the screen.

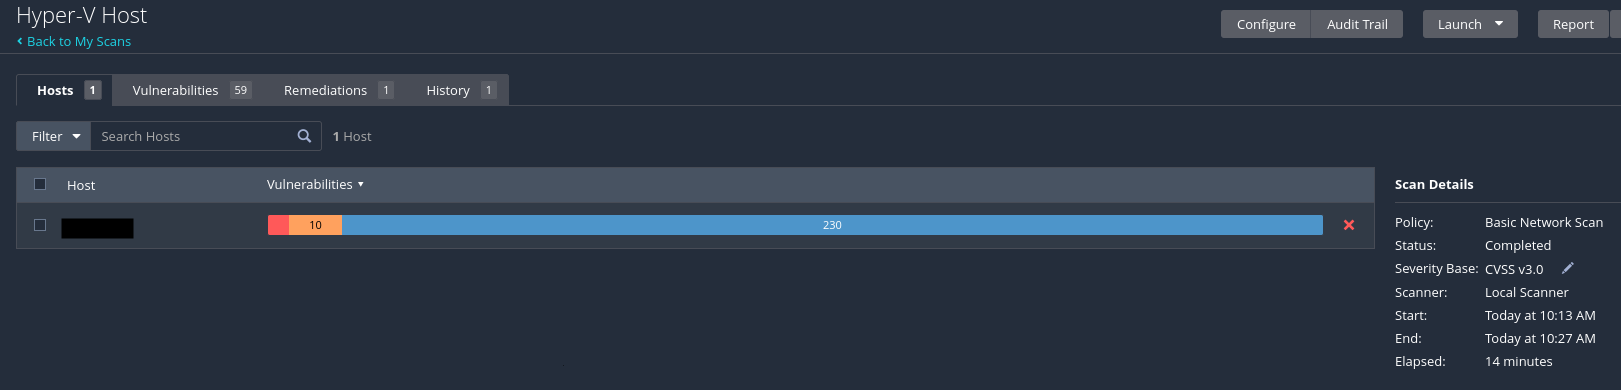
The scan will take some time (~15 minutes for me). Once finished, the status on teh right will say "Completed".
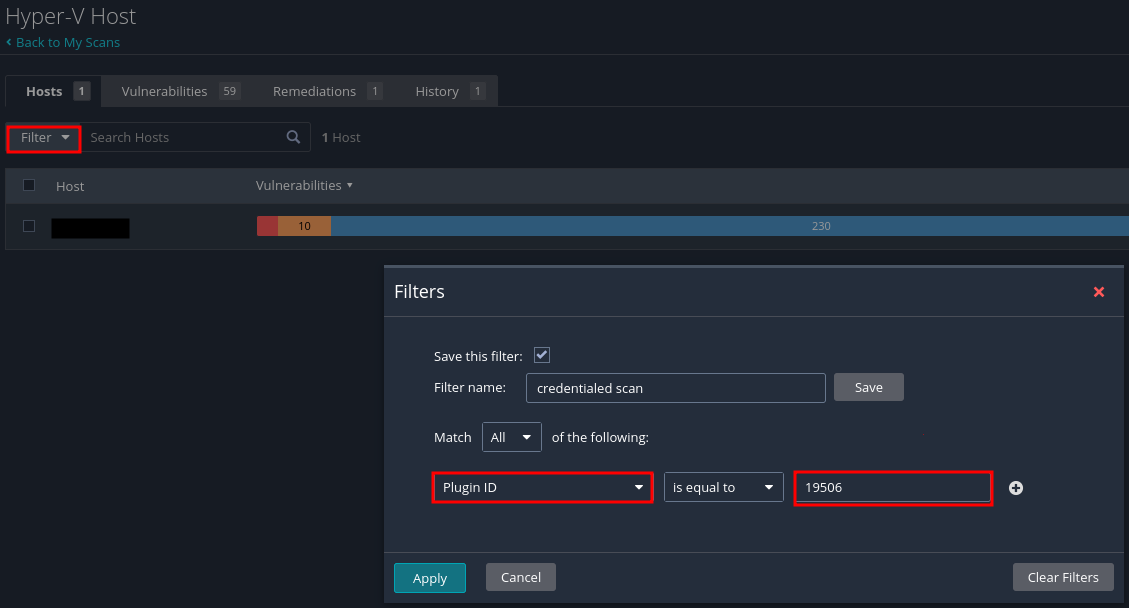
The first thing that I do is to verify that the scan is credentialed. Credentialed scans provide a more thorough examination of the host. To verify credentialed scans, you can set up a filter on the credentialed scan Plugin ID. For this, click the Filter button, and set the filter to Plugin ID is equal to 19506. Click Apply.
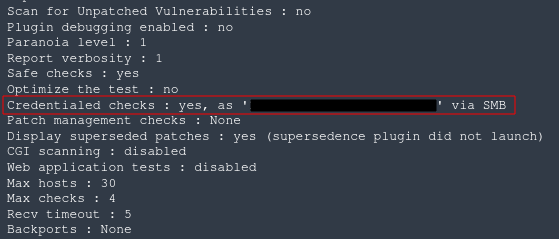
Click the plugin to reveal the details. In this window, search for "Credentialed checks". Ensure that this yes.
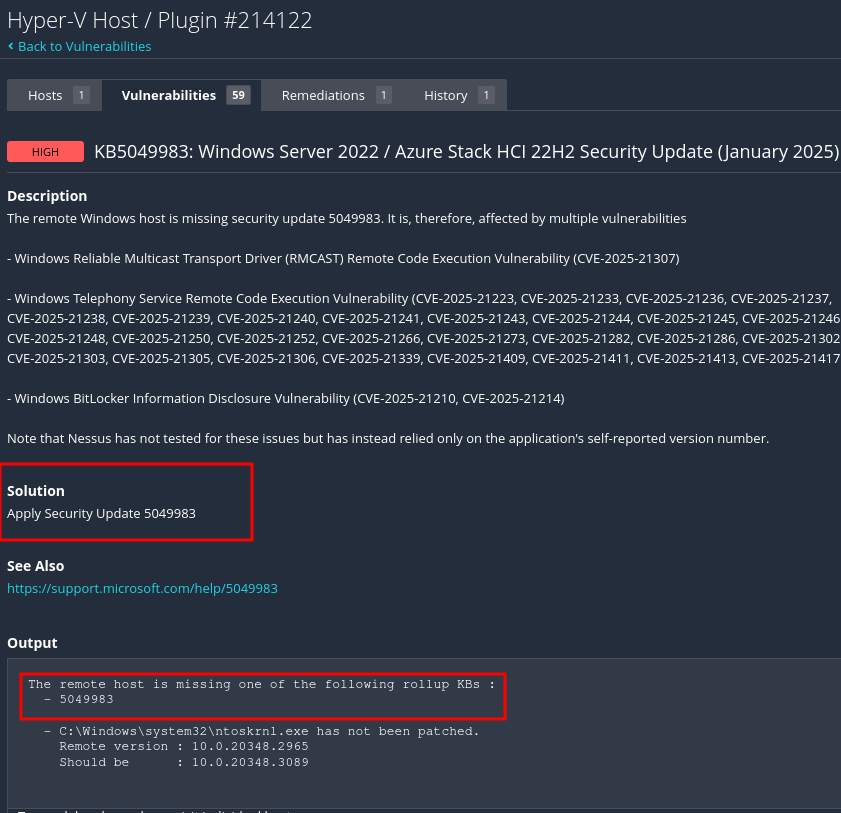
Once verified, go back to the scan page. Click "Filter" then "Clear Filters" to remove the filter. You can now click on the scan to get a detailed listing of vulnerabilities found by Nessus. The first two finidngs for my scan were related to January updates.
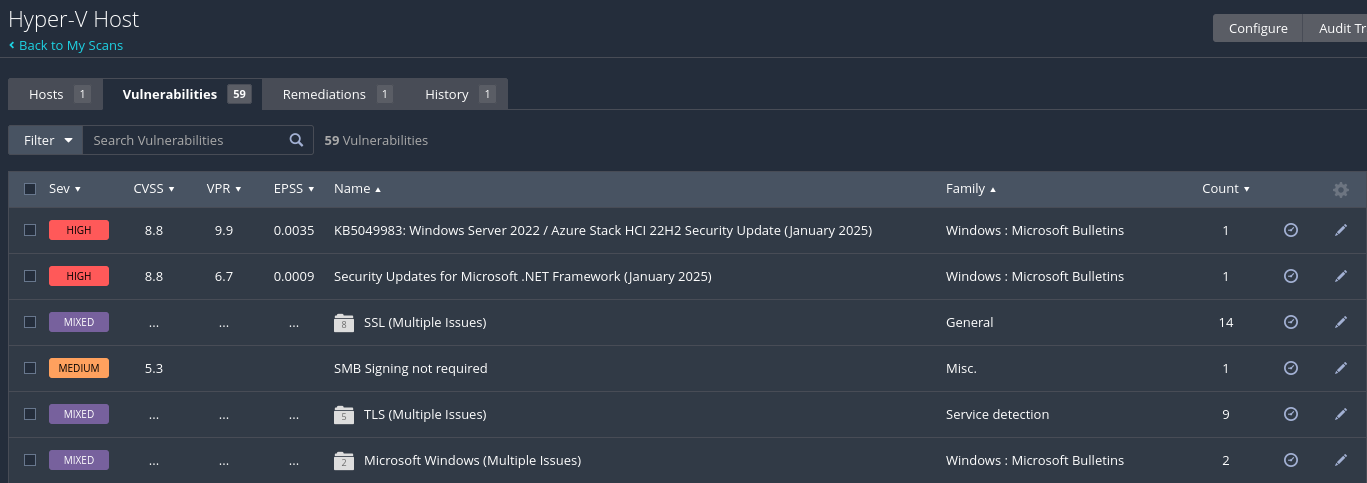
Click on any vulnerability to see the details. The details will show what the vulnerability is (in my case, a missing KB), and how to remediate the vulnerability (in my case, installing the 5049983 KB).
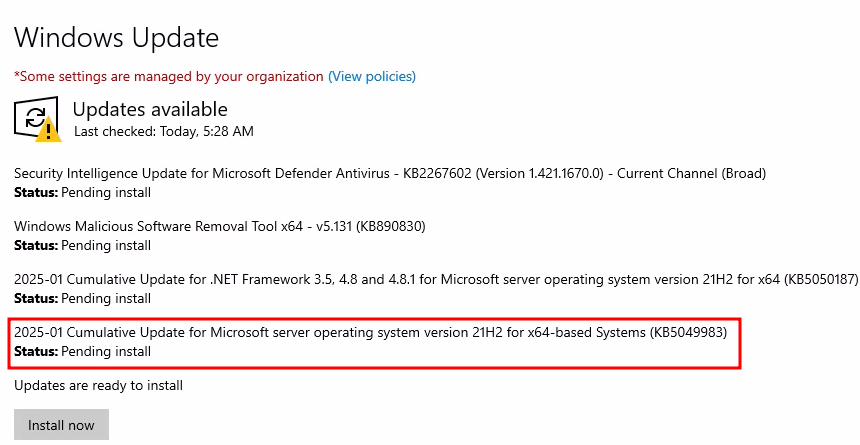
To remediate the vulnerability, I ran Windows Update. Windows noted that the same update found by the scan was not on my computer, so I installed it.
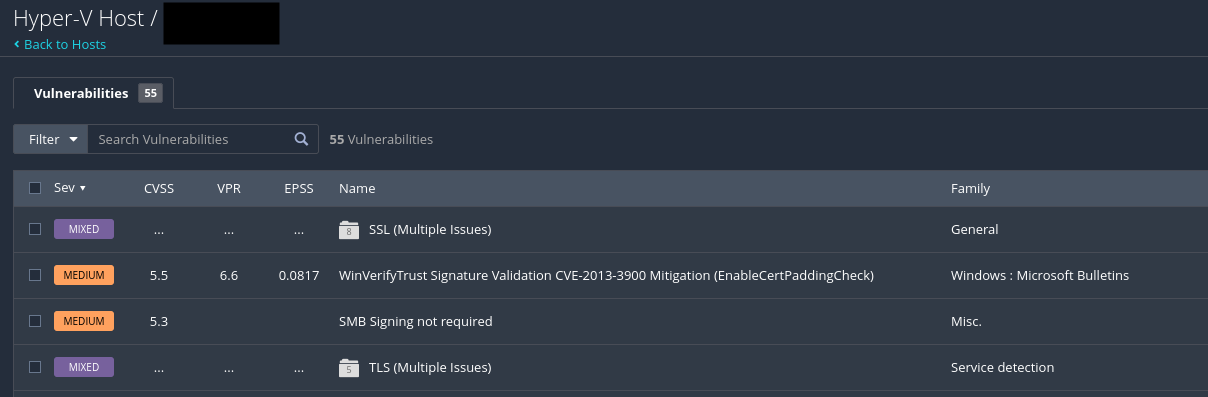
After an update (and reboot), I reran the scan on that host to verify that the vulnerability was remediated. As shown below, both January-related findings no longer show up in the scan!
Conclusion/Lessons Learned:
In this lab, I set up a Nessus container, and performed a scan on one of my computers. I remediated two of the findings from the scan, and performed another scan to verify the remediation. By utilizing Nessus, we were able to discover vulnerabilities that could potentially be exploited by attackers, emphasizing the importance of regularly assessing and patching systems.